 Minecraft · Java + Bedrock · Free
Minecraft Villager Breeding & Job Planner
Everything you need to breed villagers and assign the jobs you want. The calculator below tells you how many beds and how much food to bring for the number of villagers you want to end up with. The workstation table further down is the lookup for turning any adult villager into a librarian, cleric, farmer, or any other job.
Breeder starter calculator
Workstation → profession lookup
Place the matching block within about 48 blocks of an unemployed adult villager. They'll walk to it and lock in the job. Break the block and place a different one to change their profession — but only if you've never traded with them yet.
| Profession | Workstation block | How to craft | What they trade |
|---|---|---|---|
| Farmer | Composter | 7 wood slabs | Sells bread, cake, cookies for emeralds. Buys crops from you. Also plants + harvests crops nearby. |
| Librarian | Lectern | 4 wood slabs + 1 bookshelf | Enchanted books, name tags, glass, ink. The most valuable villager for many players. |
| Cleric | Brewing Stand | 3 cobblestone + 1 blaze rod | Redstone, lapis, glowstone, ender pearls, bottles o' enchanting. Great XP source. |
| Weaponsmith | Grindstone | 2 sticks + 1 stone slab + 2 planks | Enchanted diamond swords + axes. Iron/diamond gear. |
| Armorer | Blast Furnace | 5 iron + 1 furnace + 3 smooth stone | Enchanted diamond armour. Chainmail armour. |
| Toolsmith | Smithing Table | 4 planks + 2 iron ingots | Enchanted diamond tools (pick, axe, shovel, hoe). |
| Fletcher | Fletching Table | 4 planks + 2 flint | Enchanted bows and crossbows, arrows including tipped arrows. |
| Shepherd | Loom | 2 planks + 2 string | Coloured wool, dyes, banners, paintings, beds. |
| Fisherman | Barrel | 6 wood slabs + 2 planks | Enchanted fishing rods, cooked salmon, tropical fish. |
| Cartographer | Cartography Table | 2 paper + 4 planks | Explorer maps to ocean monuments and mansions, empty maps, banner patterns. |
| Leatherworker | Cauldron | 7 iron ingots | Enchanted leather armour (bulkier stats than diamond in some cases), saddles. |
| Mason | Stonecutter | 3 planks + 1 iron ingot | Polished stone variants (granite, andesite, diorite), quartz, terracotta. |
| Butcher | Smoker | 4 logs + 1 furnace | Cooked porkchop, cooked chicken, rabbit stew, sweet berries. |
Breeding villagers, quickly
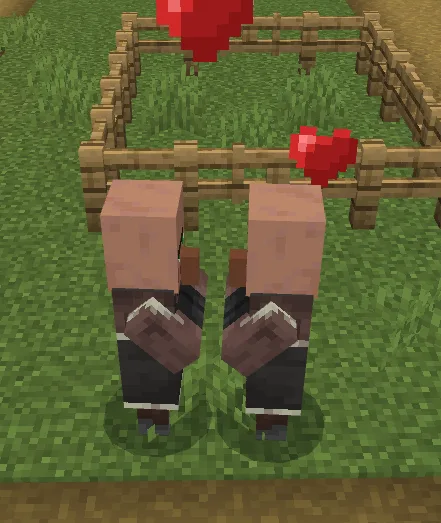
Villagers breed on their own when three conditions are met: they have an unclaimed bed to sleep in, they have enough food in their inventory to be "willing", and there's a valid block above the bed for the baby to spawn in. Get those three things right and the population climbs by itself.
The trickiest one is willingness — it's the game's way of stopping runaway breeding. A villager becomes willing when they pick up food. Any food works — you don't need a specific mix. Once they've bred once, they need to eat again before the next baby. Throw crops at them (right-click → throw) and they'll grab what they can.
Where to get the food from (the reliable way)
Farmers don't hand you free bread. You've got two options: buy some off a farmer villager for emeralds, or — much better long-term — grow your own. The proven route:
- Find a village and harvest every crop in sight (wheat, carrots, potatoes, beetroots — take whatever's ripe).
- Back at your base, fence off a farm plot big enough for a few rows of each crop. Fence it so the village's own farmer villagers can't wander in and hoover up your yield.
- Plant everything. Water within 4 blocks of every crop block keeps the growth rate up.
- Harvest and replant on a loop. A hoe with Fortune III gives you a bigger yield per crop, so put your best hoe on it — but you don't strictly need a tool to harvest.
Within a couple of in-game days you'll have a permanent surplus of food to keep the breeder running, plus enough left over for your own hunger bar and any trades that need crops as input.
Once your breeder is running, use the workstation table above to shape your economy. A common early-game combo is 2 farmers → 1 cleric → 1 librarian: farmers plant + harvest + share crops, cleric gives you infinite XP from selling rotten flesh, librarian gives you enchanted books. Add more villagers as your needs grow.
Want to find a village to build your breeder near? Try the Village Finder, or browse every SeedLander tool →





Villager breeding FAQ
Three things: at least 3 unclaimed beds within 48 blocks of the villagers, both villagers holding enough food in their inventory to be "willing" (any food works — bread, carrots, potatoes, beetroots, cake, cookies, apples), and enough room for the baby. If a villager isn't willing, throw crops at them until they pick some up.
Exactly 20 minutes of real time (as long as the chunk stays loaded). Baby villagers can't work, so you'll need to wait for them before assigning a workstation. Trapping them in a small room during that time is standard breeder design.
Place the matching workstation block within about 48 blocks of an unemployed adult villager. See the workstation table above for which block goes with which job. If the villager already has a profession, remove that job's workstation first — otherwise they'll stick with the old one.
Yes — as long as you've never traded with them yet, break their workstation and replace it. The next time they claim it, they roll fresh trades. Once you've traded even once, the trades are locked forever.
Almost always one of: (1) not enough beds in range, (2) villagers can't "see" the beds (a solid block above blocks their line to a bed), (3) both villagers full but not "willing" — they need to have picked up enough food since their last breed. Any food works. Drop crops at their feet and check they pick it up.